There is a moment every engineer knows: you are looking at a gorgeous CAD model, sleek and precise. Then you try to build it, and suddenly the whole thing behaves like it was designed by someone who has never physically touched an object before.
This is the gap between Screen World and Real World.
In Screen World, parts calmly float until you snap them together with a click. In Real World, gravity is heckling you, fasteners roll away, washers disappear into the machine and suddenly you need a third hand you do not have.
That is why we talk about Design for Assemblability, the art of designing not just the part, but the experience of putting it together. It is the shift from:
Thinking in parts -> thinking in hands.
Here is how to make that shift practical.
1. The "Two Hands, One Brain" Rule
In CAD, assembling is a mouse gesture. In reality, humans get two hands, sometimes a knee, and whatever creative bracing they can do without violating a safety orientation.
If your assembly requires:
- Holding part A
- Aligning part B
- Locating a fastener
- Turning a fastener
That is four jobs and two hands. Something needs to change.
The Fix
Design parts that self locate: tabs, slots, pockets, or even tiny shelves where a part can rest while you reach for a tool. If the part cannot sit still on its own, the assembly will never feel smooth.
Why it matters: fewer hand gymnastics means fewer mistakes and faster builds.
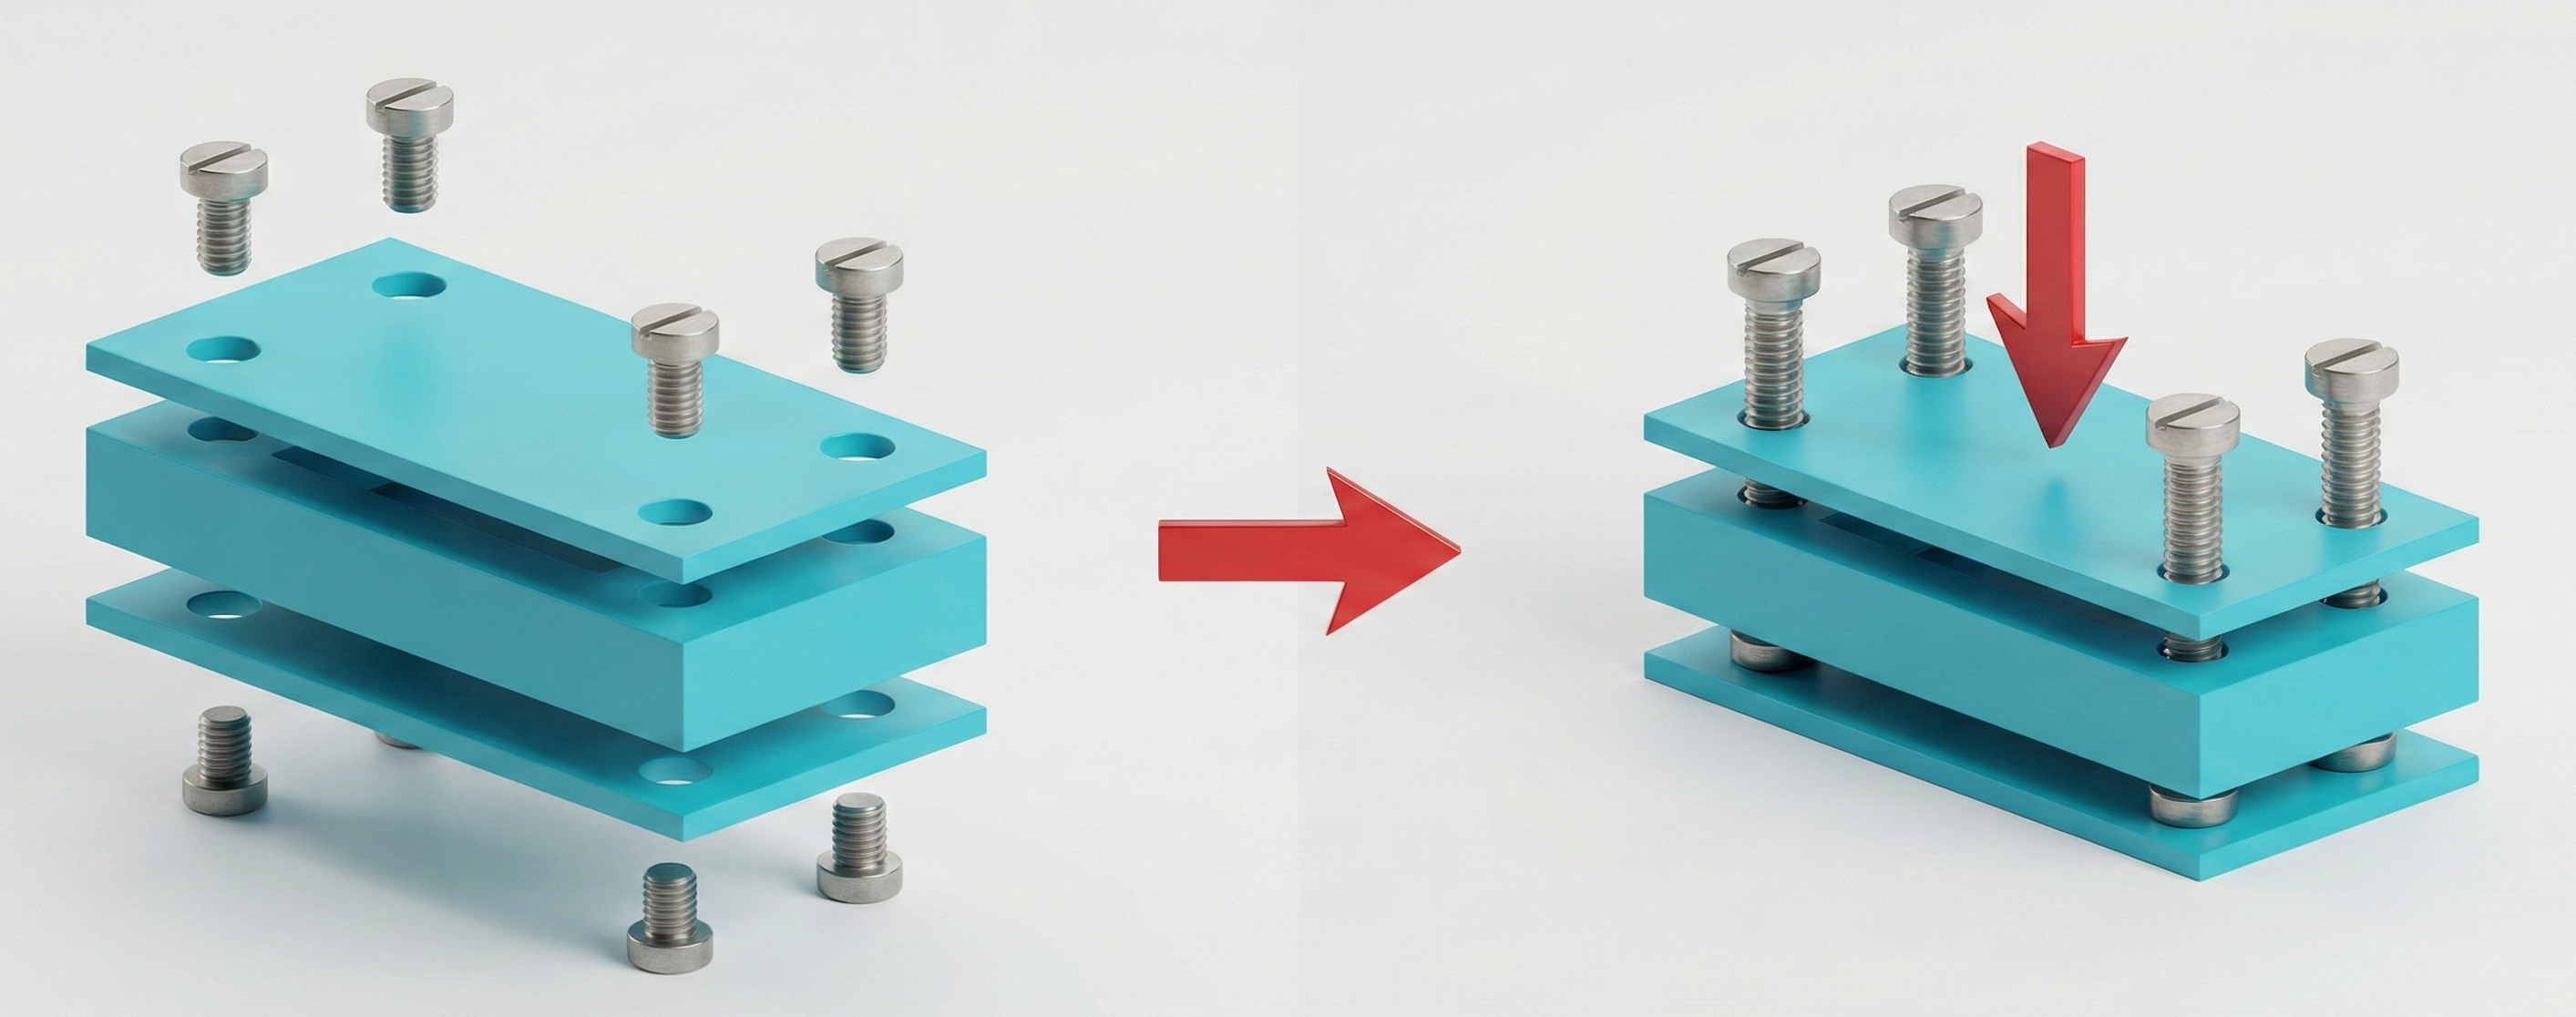
2. Gravity Is an Assembly Technician
Screen World has no gravity. Real World has it everywhere.
If a part only fits when it is perfectly balanced in mid air, it is going to get dropped, dinged, or installed backwards at least twice before lunch.
The Fix
Aim for drop and land assembly movements. Let gravity help seat components instead of fight them. Add features that make the part want to settle into the right place.
Why it matters: assembly becomes intuitive instead of tedious.
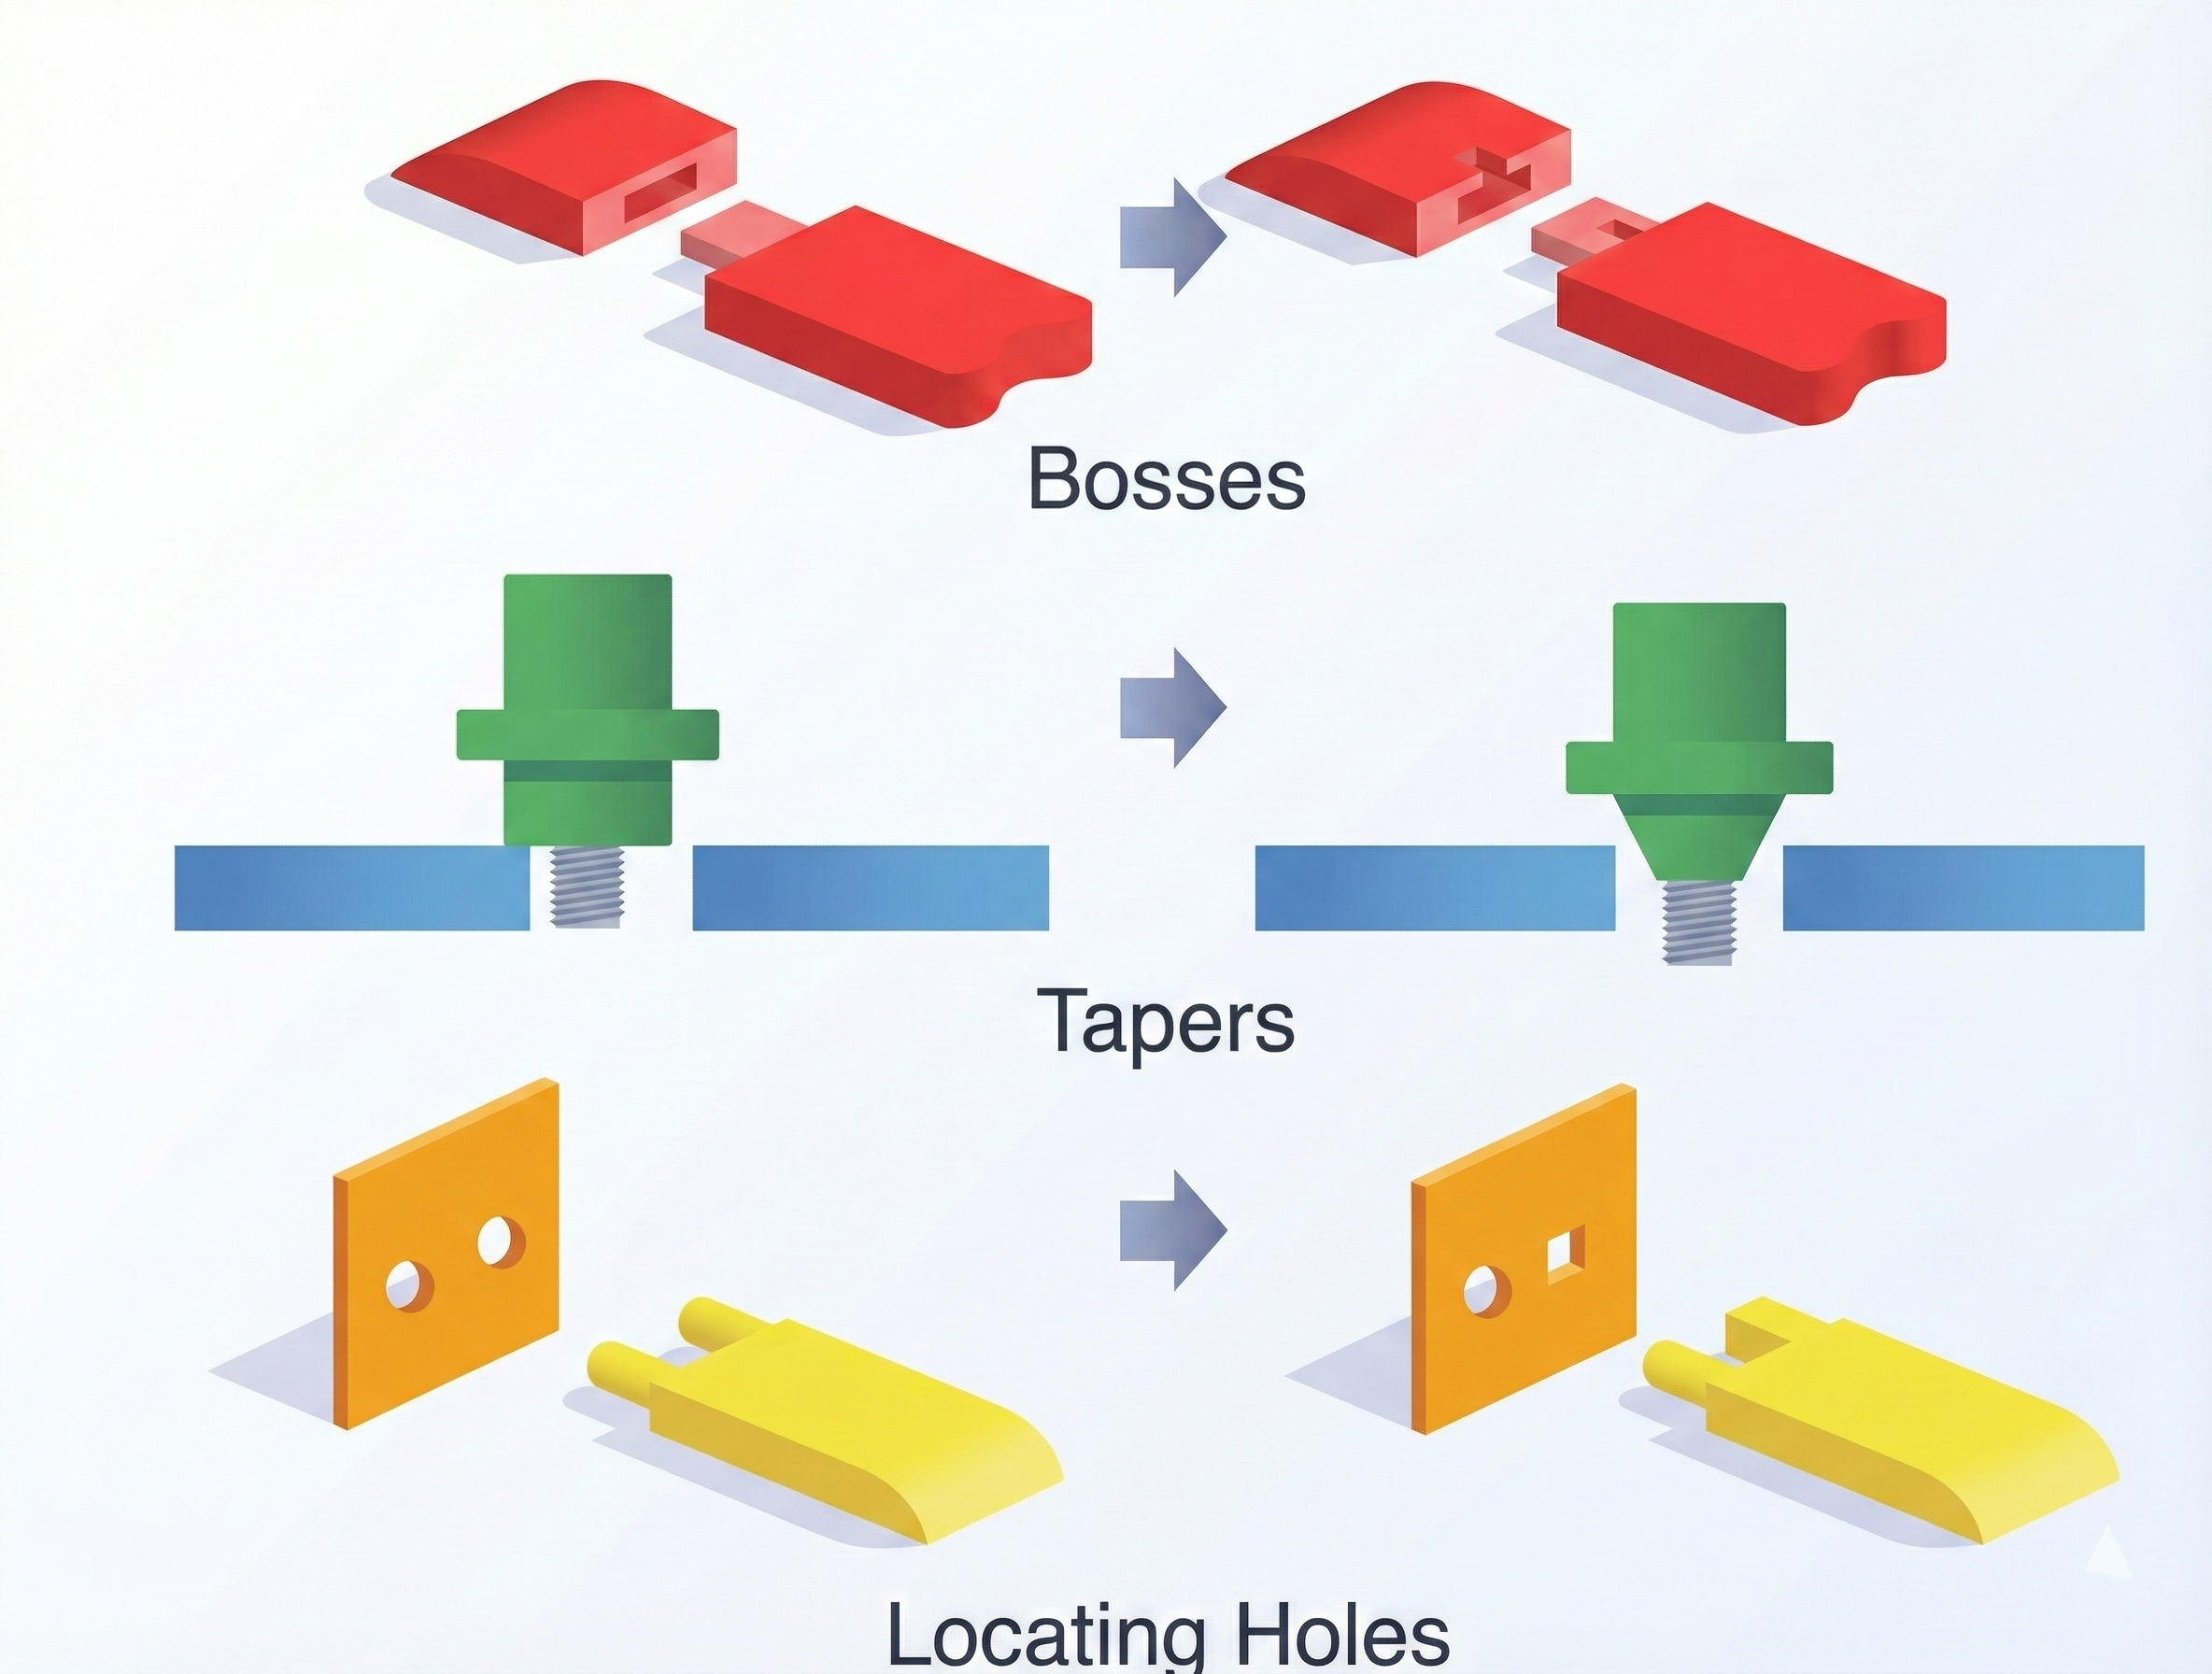
3. Guiding Features > Tight Tolerances
Tight tolerances feel like precision. Guiding geometry is precision.
A 5 mm pin into a 5 mm hole works in CAD. In the real world, that is a recipe for misalignment and muttered impolite words.
The Fix
Add chamfers, lead ins, pilot diameters, anti wiggle geometry, and slight tapers. Let the parts find each other. Think, “Can this be assembled with gloves on?”
Why it matters: chamfers cost almost nothing, but they make a design feel premium.
4. If a Fixture Is Required, It Must Be Designed
A lot of designs contain an unspoken dependency:
“This will be easy once we have a fixture.”
If you have not designed the fixture, you have not designed the assembly.
The Fix
During design:
- Declare your datums
- Design the fixture or assembly aid
- Model how the part will be held
- Confirm the sequence on paper or in prototype
Fixtures uncover problems you did not even know you had.
Why it matters: good fixtures eliminate variation; bad fixtures create it.
5. Sequence Is a Feature
Assemblies that only work if you do Step 4 before Step 2 are a design flaw. Assemblies that require rotating the whole thing upside down every 10 seconds are a design flaw. Assemblies that bury a critical screw under three other parts are definitely a flaw.
The Fix
Design with flow:
- One direction of assembly
- No buried fasteners
- No backtracking
- No tool collisions
- No “just flex it slightly” hacks
If the order matters, bake that order into the geometry.
Why it matters: good assembly sequencing eliminates bottlenecks.
6. Tool Access: Model the Hands, Not Just the Hardware
A fastener is easy to place in CAD. A fastener is hard to tighten when the tool does not fit.
If you have not modeled the wrench, torx bit, socket, or driver handle, you are working blind.
The Fix
Add tool volumes to your CAD: cylinders for screwdrivers, swept arcs for wrench swing, and space for human fingers. If the tool interferes, the assembly will too.
Why it matters: this one step eliminates a large number of field complaints.

7. Make the Wrong Way Impossible
If a part can be installed backwards, at some point, it will be. Not because people are not paying attention, but because geometry did not help them.
The Fix
Use asymmetry, tabs that only align in one orientation, polarized connectors, and unique shapes that visually guide the user. The part should reject the wrong orientation.
Why it matters: mistake proof assemblies reduce training time dramatically.
Assemblability Is Respect
At the end of the day, designing for assembly is designing with empathy.
Someone is going to hold your part in their hands for the first time and decide silently:
- “This was designed by someone who gets it.”
- “This was designed by someone who has never built anything.”
The difference is in the tiny choices: chamfers, alignment features, tool clearance, and assembly sequence.
Hands tell the truth that CAD hides.
If you want a product that builds cleanly and feels intuitive, design every part with the builder in mind.
Related reading: The Hidden Value of Building Terrible Prototypes